Simplifying Case Resolution in Microsoft Dynamics 365 with a Custom Resolve Case Button
While working on a Microsoft Dynamics 365 Customer Service implementation, I recently worked on a small customization that significantly improved the user experience for support agents handling cases.
In Dynamics 365, the Resolve Case functionality is used to close a support ticket after the issue is resolved. However, the default behavior requires users to fill additional information through a popup dialog before the case can be closed.
For teams handling a large number of cases daily, this extra step can slow down the workflow. Because of this requirement, I implemented a custom Resolve Case button using Ribbon Workbench and JavaScript, which resolves the case automatically and displays a confirmation message to the user.
This article explains the complete implementation process and how this customization helps streamline the case resolution workflow.
Understanding the Default Resolve Case Behavior
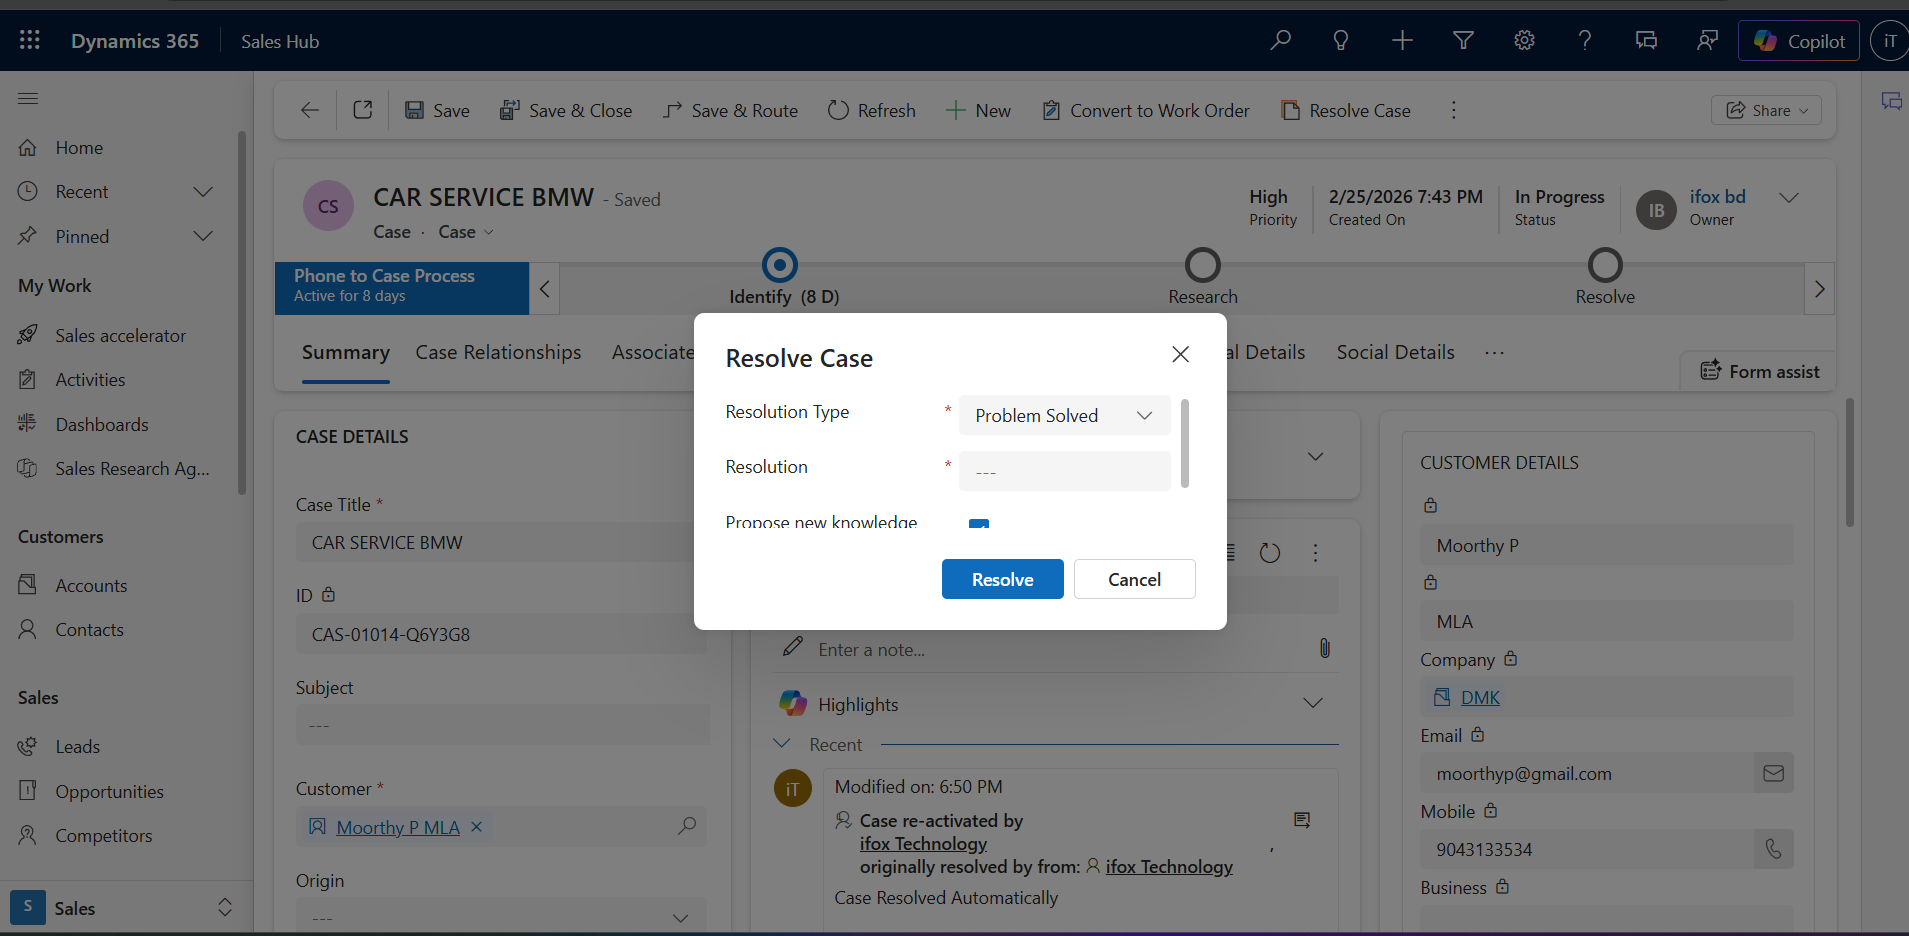
In the default Dynamics 365 system, when a user clicks the Resolve Case button on a case record, the platform opens a popup dialog asking the user to provide resolution details.
The user must fill information such as:
- Resolution Type
- Description
- Additional information related to the case resolution
Only after filling these fields can the user click Resolve and close the case.
Below is the default popup that appears when the standard Resolve Case button is clicked.
While this behavior is useful for documentation purposes, in some business scenarios users already have all the required information and do not need to enter additional details each time they resolve a case.
To simplify this process, I decided to implement a custom Resolve Case button that automatically resolves the case without opening this popup.
Creating a Custom Resolve Case Button
To achieve this customization, I used Ribbon Workbench from XrmToolBox, which allows developers to modify the command bar in Dynamics 365.
Instead of modifying the existing Resolve Case button, I created a new custom button and connected it to a custom command that triggers JavaScript logic.
In the Ribbon Workbench, I added a new button in the Case entity form ribbon and configured its properties such as label, command, icons, and tooltip.
The button was connected to a custom command created inside the solution so that the system executes our custom logic when the button is clicked.
Below is the configuration of the newly created Resolve Case button inside Ribbon Workbench.
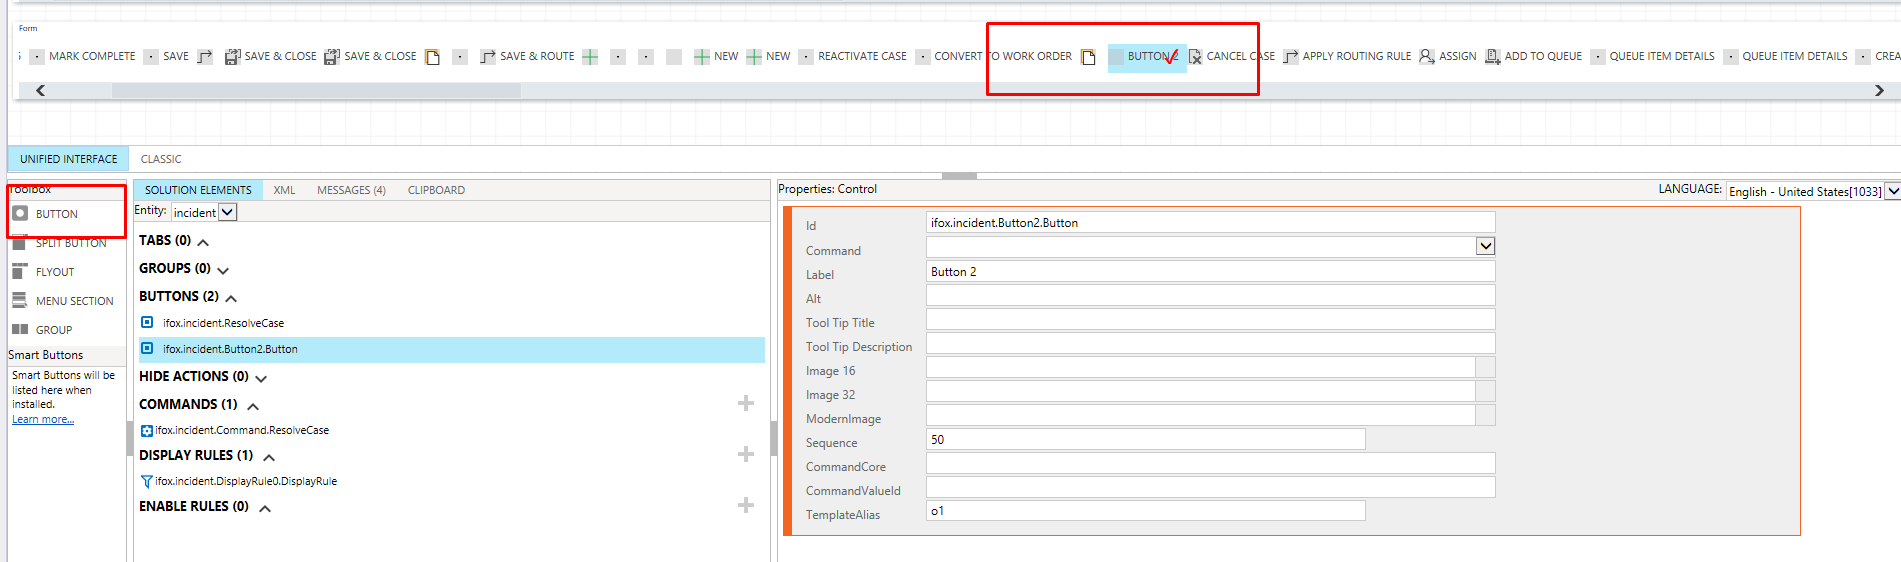
This button now appears in the Case form alongside other command bar buttons.
Connecting the Button to a Custom Command
After creating the button, the next step was to configure the command associated with this button.
Commands in Ribbon Workbench define what action should happen when a button is clicked. In this case, the button was connected to a Custom JavaScript Action.
- JavaScript Library → Web resource containing the script
- Function Name → ResolveCase
- Parameter → PrimaryControl
Passing the PrimaryControl parameter allows the JavaScript function to access the current case record and retrieve necessary details such as the Case ID.
Below is the command configuration used for the custom Resolve Case button.

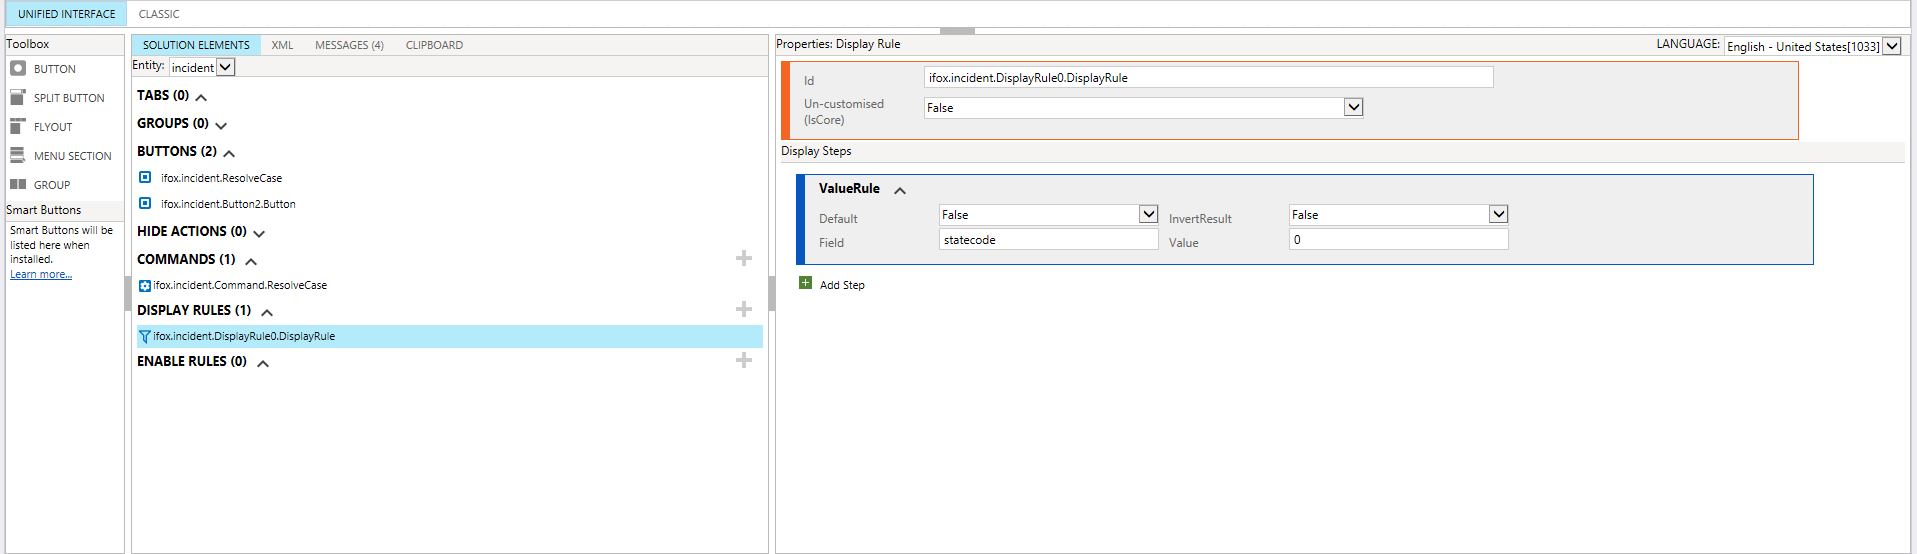
Adding Display Rules for the Button
To ensure the button appears only when appropriate, I configured a Display Rule.
The button should only appear when the case is Active and disappear once the case is resolved.
- Field → statecode
- Value → 0 (Active)
Below is the Display Rule configuration inside Ribbon Workbench.
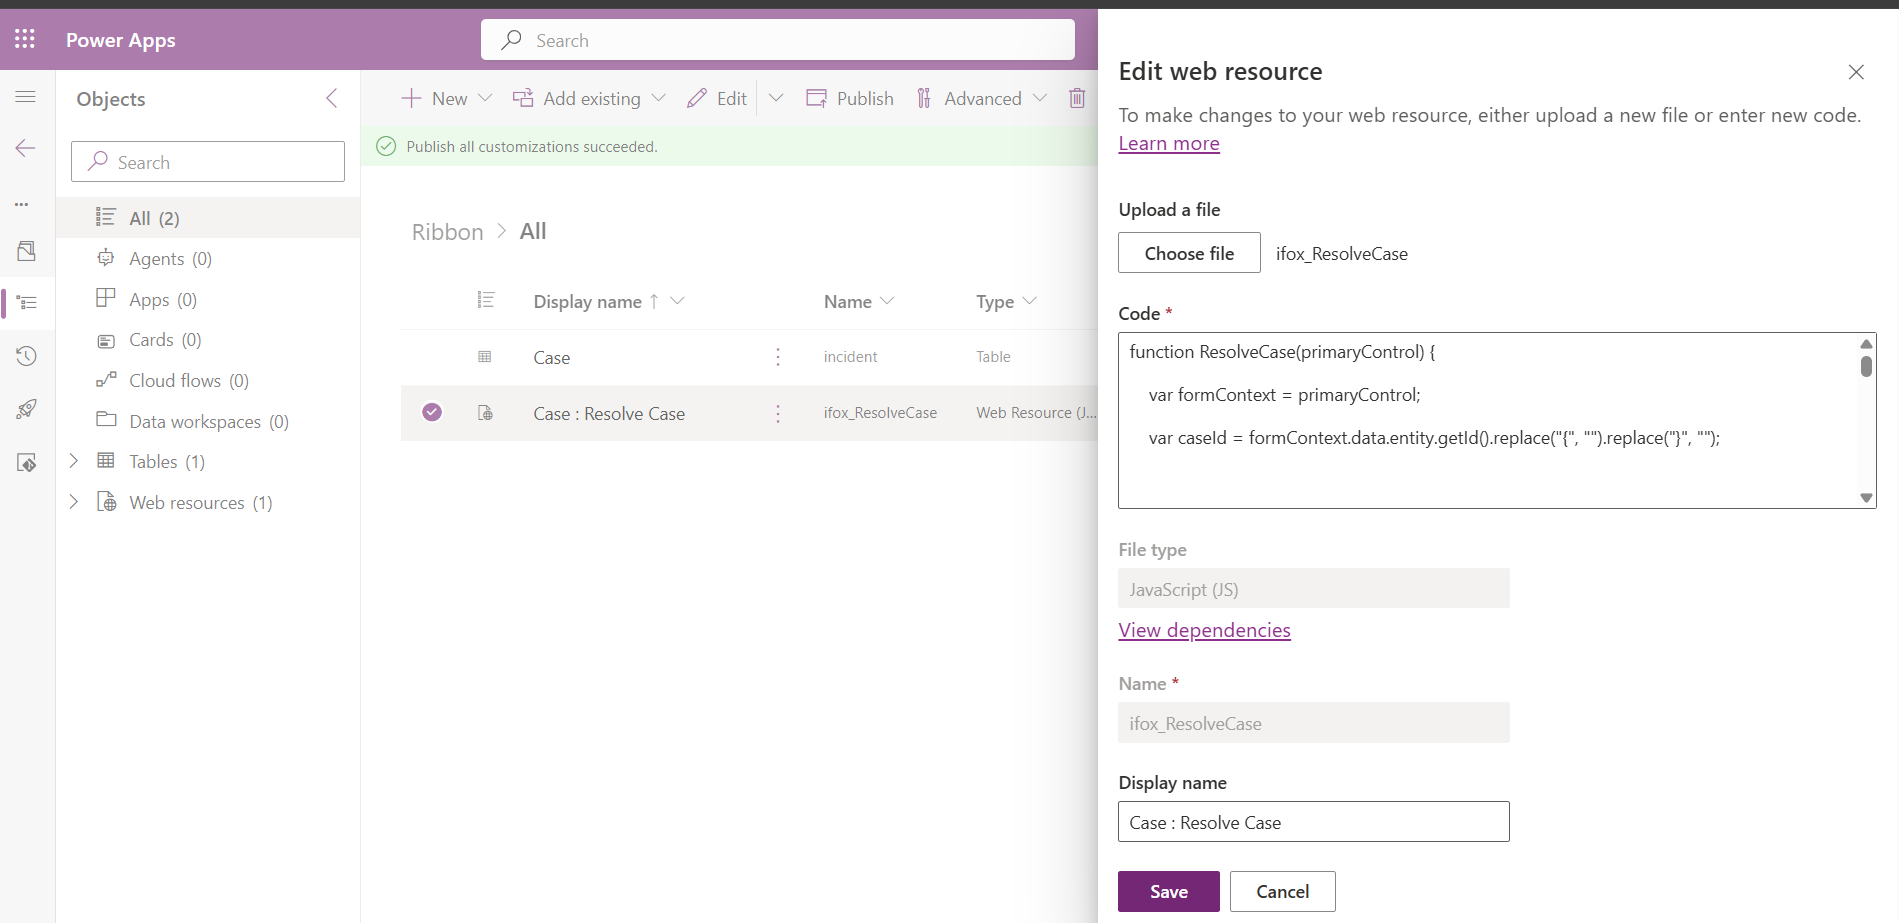
Creating the JavaScript Web Resource
Inside the Power Apps solution, I created a new web resource called ifox_ResolveCase.
The script retrieves the Case ID from the form context and updates the case record so that its status changes to Resolved.
Additionally, the script displays a confirmation message to the user once the case is resolved successfully.
Below is the web resource configuration inside the solution.
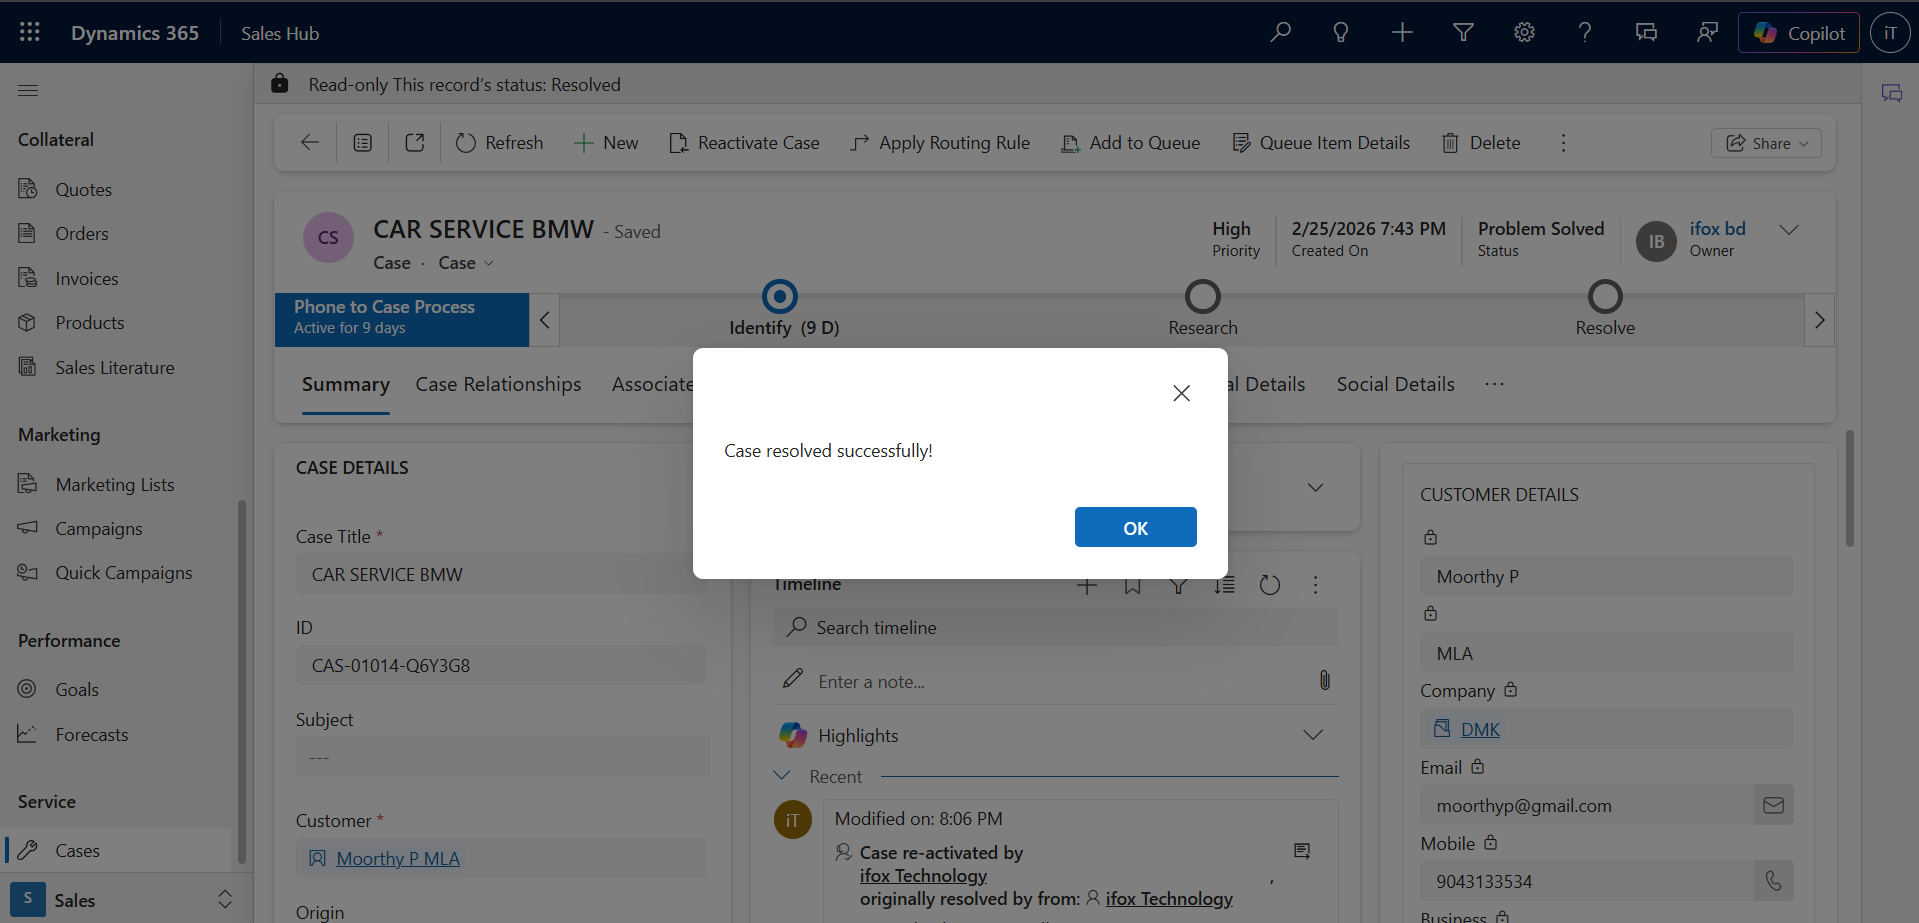
Result After Customization
Instead of opening the resolution popup, the system now performs the following actions when the custom button is clicked:
- The case is automatically resolved
- The system updates the case status
- A confirmation message appears on the screen
Below is the confirmation message displayed after resolving the case.
Benefits of This Customization
- Faster case resolution process
- Improved productivity for support agents
- Reduced manual data entry
- Simplified user experience
Final Thoughts
Dynamics 365 provides powerful customization capabilities that allow developers to tailor the platform to match real business requirements.
By combining Ribbon Workbench, JavaScript Web Resources, and command configuration, developers can modify system behavior and improve the user experience without affecting core functionality.